Wednesday, August 31, 2016

Pumpkin It Up! Pumpkin-Caramel Cinnamon Rolls


There is something so comforting about spending a few quiet moments lingering over a freshly baked pastry and a steaming cup of a favorite brew. These Pumpkin-Caramel Cinnamon Rolls, from the new cookbook Pumpkin It Up! seem like the perfect complement to a leisurely Saturday morning -- especially when served alongside a delicious latte. In my next post, author Eliza Cross offers tips for cooking with pumpkin. Stop by A Little Loveliness for our cookbook giveaway!


Pumpkin-Caramel Cinnamon Rolls
Makes 12 servings

1 (8-ounce) tube refrigerated seamless crescent dough
13 cup canned or cooked pumpkin purée
6 tablespoons butter or margarine, softened, divided
14 cup plus 2 tablespoons firmly packed dark brown sugar, divided
2 tablespoons milk, divided
1 teaspoon pumpkin pie spice
14 teaspoon salt
14 cup finely chopped pecans
14 teaspoon vanilla extract
1413 cup powdered sugar

Preheat oven to 350 degrees. Prepare a 9-inch round cake pan with nonstick cooking spray and set aside.

Unroll the dough and pat into a large rectangle. In a small bowl, combine the pumpkin, 4 tablespoons butter, 2 tablespoons brown sugar, 1 tablespoon milk, pumpkin pie spice, and salt; stir until well blended. Spread mixture over the dough and sprinkle with pecans. Starting with the long side, roll up the dough; pinch the seam to seal. Cut dough into 12 equal slices and arrange cut-side up in the prepared pan. Bake for 20–25 minutes, until rolls are golden brown. Cool in the pan on a wire rack for 15 minutes.

Heat the remaining 2 tablespoons butter in a small saucepan until melted. Stir in the remaining 14 cup brown sugar and 1 tablespoon milk; cook over medium-low heat for 1 minute. Remove from heat and allow to cool for 5 minutes. Stir in the vanilla and 14 cup powdered sugar; beat until well blended, adding more powdered sugar until desired consistency is reached. Drizzle the rolls with the icing.


Photos from Pumpkin It Up! Used with permission.


Monday, August 29, 2016

Pumpkin It Up! Baby Breakfast Pumpkin Recipe


With Labor Day weekend fast approaching, I am already looking ahead to autumn. The changing of seasons will bring radiant foliage, harvest celebrations, and a bounty of colorful gourds. The crisp, cool days revive my energy, giving me fresh motivation to experiment with new dishes and entertain loved ones. For those of us drawn to all things pumpkin, a new cookbook from Eliza Cross offers recipes for bringing the quintessential symbol of fall into our seasonal menus. This week on A Little Loveliness, I will be sharing breakfast favorites from Pumpkin It Up!, as well as cooking tips from Eliza and a giveaway of her gorgeous new cookbook. 


Baby Breakfast Pumpkins
Makes 4 servings


4 (1-pound) baking pumpkins
12 pound bulk breakfast sausage
5 eggs, divided
4 slices stale bread, cut into 14-inch cubes
1 tablespoon chopped fresh Italian parsley
12 teaspoon dried sage
12 teaspoon salt
12 teaspoon freshly ground pepper
4 teaspoons grated Parmesan cheese, divided


Preheat oven to 350 degrees. Line a baking sheet with parchment paper or aluminum foil. Use a sharp knife to slice the top quarter off each pumpkin; remove the seeds and stringy pulp.


In a medium frying pan, break up and fry the sausage until thoroughly cooked, 5–6 minutes.
Remove from heat, drain grease, and cool to room temperature.


In a large bowl, whisk 1 egg until foamy. Add the sausage, bread cubes, parsley, sage, salt, and pepper; stir until well combined. Fill each pumpkin with the bread mixture to about 1 inch from the top; transfer to the prepared baking sheet. Bake until the pumpkins are fork tender, 40–45 minutes. Remove pan from oven and use a spoon to gently flatten the stuffing in each pumpkin.

Increase oven temperature to 400 degrees. Crack 1 egg and gently pour it over the stuffing mixture for each pumpkin, being careful not to break the yolk; sprinkle each with 1 teaspoon cheese. Cover the pumpkins lightly with foil, return to oven, and bake until eggs are set to desired doneness, 10–13 minutes.


Photos from Pumpkin It Up! Used with permission.

Monday, August 15, 2016

Scalloped Layer Cake with Orange Buttercream


"Woods are filled with the music of birds, and all nature is laughing under the glorious influence of summer." ~ Charles Lanman


Over the weekend I had the opportunity to decorate a cake -- a little pleasure I have not made time for in a while. There is something so homey about the smell of freshly baked layers cooling on the counter, ready to be topped with fluffy buttercream frosting.


When I took my first cake-decorating course as a newlywed, my first purchase was a set of petal pans. I have always loved the graceful curves of this design, so I knew it would be a favorite look. What I didn't realize was how time-consuming and tedious it could be to frost all of those curves. Eventually I parted ways with my scalloped pans, but the recent trend toward "naked" cakes revived my interest. 


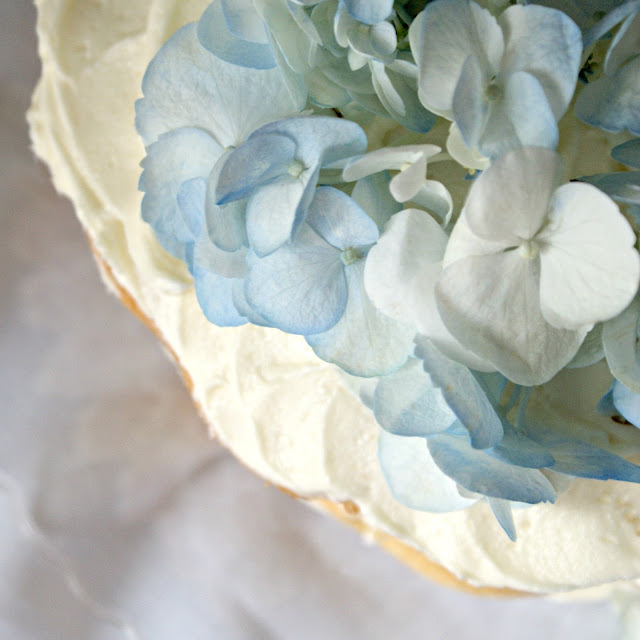
Thanks to this Sweet Creations Layer Cake Pan Set, I can now make lovely scalloped cakes without the fuss of trying to cover the edges. One standard cake mix provides enough batter to fill the two shallow cake pans twice. A cake leveler is included in the kit, but the layers baked up so evenly that I did not need it. Swirls of fluffy Orange Buttercream and a smattering of delicate hydrangea blossoms completed the design.


Orange Buttercream
Enjoy a refreshing yet subtle taste of citrus.
1/2 cup shortening
1 stick margarine
4 tablespoons milk
1/2 teaspoon orange extract
1 pound confectioners sugar
In a large bowl, beat shortening, margarine, milk and orange extract with a mixer at medium speed until creamy. Gradually beat in sugar until smooth. Add more milk, a little at a time, if the frosting is still too thick to spread easily. 


This four-layer scalloped beauty made a perfect addition to the cake walk at a carnival-themed dinner at our church. I can see many possibilities for this pan set so hope to have more varieties to share soon.


"Each fairy breath of summer, as it blows with loveliness, inspires the blushing rose." ~ Anonymous

Tuesday, August 9, 2016

Sail into School with a Seafood Dinner


I can hardly believe that tomorrow officially begins Carson's senior year! The other three children are not far behind, with Christian starting high school as a freshman, Mary Ashley beginning seventh grade, and Emma taking on fifth grade. We celebrated last night with a back-to-school dinner. Highlights of our themed tablescape included a Hampton Nautical Model Ship, Nautical Sailor Mini Popcorn Boxes filled with Life Saver Gummies, and Anchor and Sailor Themed Straws.


For our "Sail into School" menu, I decided to honor Carson with one of his favorite entrees: steamed shrimp from Publix. In keeping with our seafaring theme, fresh fruits and greens, fettuccine Alfredo, and garlic knots took on appropriate names.


We decided that each year when we have a senior in the house, that kid will get to decide the menu for our back-to-school celebration.


I designed printables for our little party, but unfortunately my little printer wouldn't party. Note the four hearts below the boat, representing my four little loves!


For dessert, Key Lime Icebox Pie was a refreshing choice. Find this super-simple recipe here.


I'm praying that this year will be smooth sailing for all of our sweet ones who are headed back to school!


Wednesday, August 3, 2016

Among the Pink Roses


One of the delights of visiting Dana's garden a few weeks ago was admiring her roses. Enjoy a peek at these blushing pink beauties!


"But he who dares not grasp the thorn
Should never crave the rose."
~ Anne Brontë


"And the shower of roses spun around me, inviting me to take part in their ever-present waltz." ~ Gina Marinello-Sweeney


"I'd love to have the whole place swimming in roses." ~ James Joyce


"It takes a loyal gardener to tend roses." ~ Sondra Faye


"A newly-sculpted garden burst forth, glistening in an afternoon sun. It welcomed the dusty pink rose ... ."
Gina Marinello-Sweeney


Monday, August 1, 2016

A Sunshine Basket Sweetened with Lemon Cheese Squares


A housewarming gift for a friend who just bought a house, this bright basket of treats offers refreshing summertime flavors. A kitchen towel, oven mitt and trio of mugs from Sur La Table inspired this lemon-themed surprise.


Fresh flowers, a blueberry scone mix, homemade Lemon Cheese Squares and a packet of loose tea round out this tea party for three.


Lemon Cheese Squares

These freeze well, so I plan to save some for an upcoming tea party.

1 box Pillsbury Plus lemon cake mix
1 stick margarine, melted
1 egg
Mix in mixer and press into greased sheet cake pan (10 1/2" x 15 1/2"). In the same bowl, mix:
3 eggs
1 (8-ounce) package cream cheese
2 tablespoons lemon flavoring*
1 pound box powdered sugar
Mix well and pour over the above layer. This mixture will be soupy. Bake at 350 degrees for 35 to 40 minutes. Cut into squares immediately while still hot, then let cool.

*One tablespoon lemon extract may be substituted for lemon flavoring.


Amidst the joys of unpacking and settling into their newly renovated home, I hope this family of three will enjoy pausing for a few moments of relaxation together.


"The light is what guides you home, the warmth is what keeps you there." ~ Ellie Rodriguez

Blog Widget by LinkWithin