Thursday, January 31, 2013

One Last Stroll Through the Birthday Craft Fair


I hope you have enjoyed visiting Mary Ashley's Birthday Craft Fair. Since posts stretched more than a week, I am sharing this final party post to tie all the details together. For details of our shabby chic invitations, go here.


To craft and twirl with the birthday girl, visit this post to check out her new skirt.


To view our craft fair decor, click here.


And to pause for a picnic, visit this post.


The highlight of the craft fair was making accessories with the girls. Check out our floral headbands here.


And gather on the quilt with us to make beaded bracelets in this post.


And finally, the real treat in these treat bags is making them. Find them in this post.


I hope you have enjoyed Mary Ashley's Birthday Craft Fair. We made crafts and memories at this year's celebration. Thank you for being part of our fun!


Wednesday, January 30, 2013

Birthday Craft Fair Project: Pretty Purses


We surprised Mary Ashley with a sewing machine for her 9th birthday, so I was eager to plan a sewing project as the culmination of our recent Birthday Craft Fair. These pretty, petite purses could not be cuter!


I am a big fan of Tanya Whelan's romantic line of fabrics, and her Barefoot Roses Legacy Collection was perfect for our tiny totes. (Visit Tanya's blog here.) I purchased a fat quarter collection of six coordinating fabrics here. This gave us enough fabric for 12 custom bags -- a steal at a little more than $1 each in supplies. My mother-in-law came over before the party to cut and bundle the fabrics to make ready-to-sew kits.


I used the Small Treats Tote pattern from All People Quilt for our project. Find the pattern here. The picture above shows the first tote I assembled. In my first attempt, I didn't realize I needed to square off the corners before turning the bag right-side-out, so it is a flat bag. Alleviating that step makes the project go a little quicker and might be simpler for beginning sewers.


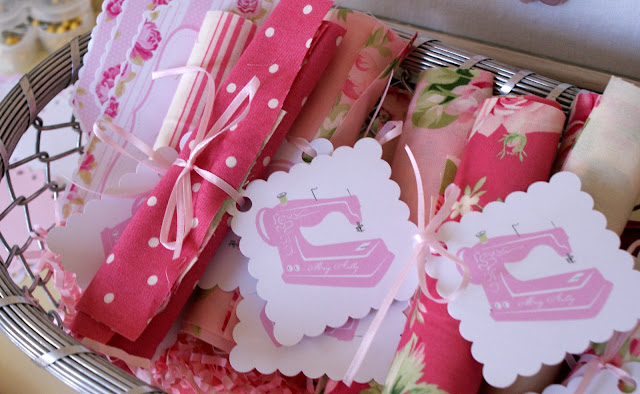
This adorable pattern makes a lined, reversible bag. I designed the pink, personalized sewing machine tag to coordinate with other party printables.


I added Mary Ashley's name to the sewing machine -- a sweet detail to keep in her scrapbook to commemorate the year she got her sewing machine.


With two other craft projects, plus a picnic lunch, birthday cake, present opening and time for free play, we ran out of time during the party to construct the bags. But I promised Mary Ashley a sewing day on our first free day, and thankfully the Monday after our party was a school holiday. We sat down together at her new sewing machine and made the pretty bag pictured above. We finished the corners on her bag, so it has a flat bottom.


Perfect for a pocket full of posies, the finished bags are 4" x 4" x 2". Above, you see the difference finishing the corners makes in the finished tote.


We plan to invite the girls back, two at a time, to sew their totes. With the fabrics already cut and a few bags already constructed, this will provide a quick project and fun afternoon play date.


Delightfully sweet and perfectly petite, these lovely floral bags are sure to become treasured totes. And they will be sew much fun to make! 


"A profusion of pink roses bending ragged in the rain speaks to me of all gentleness and its enduring." ~ The Collected Later Poems of William Carlos Williams


Tuesday, January 29, 2013

Birthday Craft Fair Project: Beaded Friendship Bracelets


"A single rose can be my garden ... a single friend, my world." ~ Leo Buscaglia


For the second craft project in Mary Ashley's recent Birthday Craft Fair, we gathered the girls on a picnic quilt to make friendship bracelets.


I bought strings of glass beads at Michaels and let each guest choose one. We also used grosgrain ribbon, Stretch Magic cord, scissors and collapsible needles to make the bracelets.


We made our bracelets by wrapping ribbon around our beads as we threaded the elastic cord through. Twinkle and Twine has a great tutorial for this craft, along with several different methods for incorporating ribbon into the design.


This craft wound up being a little advanced for our craft fair guests, who ranged in age from 6 to 9. The mothers at the party assisted the girls with knotting the cord and starting the beading. We found that it was easier to make the bracelets if we kept them in our laps or on the quilt as we worked.

In the end, we had pretty pearl bracelets to celebrate the gift of friendship.


Monday, January 28, 2013

Birthday Craft Fair Project: Making Floral Headbands


The highlight of Mary Ashley's recent Birthday Craft Fair was making crafts with the girls, who ranged in age from 6 to 9. I planned three projects for the afternoon. Crafting is Mary Ashley's favorite pastime, but I wasn't sure how many other guests would share her interest. I thought making accessories would appeal to a broad range of girls, whether they boast a knack for crafts or a passion for fashion.


Our first craft of the day was making floral headbands. The girls loved this project! I purchased pink and white headbands from the jewelry department at Hobby Lobby and let each girl choose one as we began. The headbands came with a little ribbon loop wrapped around them, which allows embellishments to be changed out.


I set up a "booth" in the sitting room with a variety of pretty embellishments for making our floral headbands. The girls got to shop here for their favorites.


We made three types of headband embellishments. The girls loved this project so much, we could have spent the whole afternoon making these accessories. Keep reading for details of our three options.
 
 
Shabby Rose Headbands
 
 
The first accessories we made were shabby roses. I used Tanya Whelan's Delilah fabric for most of the roses (purchased here), then made a few more with scraps of fabric in my stash. I made the roses ahead of time by tearing strips of fabric and gathering them. You could do this with a sewing machine, but I did it by sewing a loose stitch by hand with DMC floss. Then I pulled the gathers, wound the strip into a flower, and stitched it together. To add a little detail, on some of the flowers I added a few more stitches to create a bud and petals. Each flower was unique. I displayed the flowers on covered cake plates and pinned several to my dress form and let each girl choose her favorite. Each girl then glued a felt button to the back of her flower. The girls used fabric glue for this project, but one of the other moms had to go back with hot glue to secure some of the flowers. So the girls could clip their shabby roses to a headband or pin them to a sweater, we added a pin and a clip to the felt button. These turned out so pretty!
 
 
Covered Button Silk Flowers
 
The girls' favorite project of the day was making covered buttons to glue to the center of a silk flower. In fact, I wish I had bought more covered button kits because the girls were eager to make more when our supplies ran out. I found bouquets of silk flowers on sale for $2 each at Michaels and picked up Gerber daisies in pink, white and yellow. We cut the stems off the flowers and hot glued an alligator clip to the back. I filled a little pitcher with scraps of fabric and let the girls choose their favorites for making covered buttons. None of the girls had ever made a covered button before, but quickly discovered what a quick and easy project it is. Several were eager to show their moms how to make a covered button, and one was determined to go to a craft store that very night to get a kit. We hot glued a covered button to the center of each flower. I chose buttons a little larger than the centers, so we did not have to disassemble the silk flowers. My friend Stacey set up a station to hot glue everything for the girls. We didn't want to risk burning any little girls' fingers, so they waited patiently for their turn with Stacey.
 
 
Buttons and Bows
 
Mary Ashley actually suggested our final headband craft: making bows and letting the girls glue a button to the knot. I had ribbon and buttons leftover from other projects, so we let the girls choose the options they wanted. Stacey hot glued the buttons and alligator clips to the bows, and I ran a lighter across the ends of the grosgrain ribbon to seal the edges.


It was really neat to see the girls' finished products. They came up with some beautiful combinations for their headbands.


And the real treat is seeing their beautiful faces framed by headbands they made at Mary Ashley's Birthday Craft Fair.


For our next project, we are returning to the picnic quilt to make a beaded craft together.


Friday, January 25, 2013

Birthday Craft Fair Picnic Menu


"So mayst thou live, dear! many years,
In all the bliss that life endears ... ."
~ Thomas Hood


Mary Ashley's Birthday Craft Fair began at noon Saturday. As we waited for guests to arrive, the girls played in Mary Ashley's room and I fussed over final party details. Joe's mother and her friend Joy came over an hour before the party started, and they helped me pull everything together. Once all the guests arrived, we served basket lunches to the girls. Our Alabama weather has been so varied this January -- upper 70s one week and mid-30s the next -- so I wasn't sure what to expect Saturday. But we were blessed with a mild, sunny day perfect for picnicking outdoors.


Birthday Craft Fair Menu

Cocktail-Size Croissants with Turkey and Lettuce
Kettle-Cooked Potato Chips
Broccoli Salad
Fresh Strawberries
Cupcakes
Pink Lemonade


I spread a quilt in the yard so the girls could sit together in the sunshine to enjoy their basket lunches. I picked up the basket above on clearance at Hobby Lobby awhile back. I love the neutral linen liner with crocheted lace and button accents. I had four of these baskets and picked up the rest of our wicker baskets at Dollar Tree. Little touches like buttons hot glued to toothpicks carried the theme into our picnic.


Pink lemonade was the drink of choice at Mary Ashley's Birthday Craft Fair. I designed the liners and straw toppers with digital papers from SunshineLemons and cut the liners with scalloped-edge scissors.


Above, friends Claire, Emma Cate and Kristy gather with Mary Ashley for picnic fun. After lunch, the girls spent a couple of hours making crafts and playing outside before coming back to the sitting room for cupcakes and presents.


My icing turned out thin for this party, so I was disappointed in the look of my cupcakes. The taste and toppers were great, though, so the girls loved them. I made the topper above by punching two scalloped circles. The scale of the larger circle was too big for the smaller one, so I pleated 1-inch strips of paper, wrapped the pleated strips into a circle, and hot glued them into place.


Half of the cupcakes were pink Mary Ashley cupcakes, and the other half were buttoned up with the number 9. I glued nearly half of these toppers upside down. Thankfully I caught my mistake before offending our birthday girl with cupcakes topped with the number 6. I made the candy buttons by filling a button mold from Fancy Flours with Wilton Candy Melts. I punched the smallest and larger papers by hand and used my Cricut Mini to cut the middle scalloped circle. Tiny buttons from Wal-Mart added the final touch to our toppers.


Joe and the boys had a full day of sporting activities Saturday, so we served cupcakes at the craft fair and saved the small cake above for the family to share. I cut the bunting triangles from shabby chic wafer papers from Queen of Tarts Wafers.


Chic & Unique Celebration Cakes

When I saw the cover of this book, I knew it would be the perfect inspiration for Mary Ashley's birthday cake. Click the title above for more information about this beautiful cake decorating book.


"May the sun shine, all day long,
everything go right, and nothing wrong.
May those you love bring love back to you,
and may all the wishes you wish come true!"
~Irish Blessing


Here are a few of the sweet friends who joined us for Mary Ashley's Birthday Craft Fair.


Kimber's smile is as sweet as her cupcake.


And friends Emma, Emma Cate, Mary Ashley and Kristy are cute as a button!


When the girls sat down to enjoy their picnic, I asked them to raise their hands if they like making crafts. All hands went up, so I was eager to get started on our creative projects as soon as the girls finished their lunch.


So have another round of cupcakes, drink your fill of pink lemonade, and join me next week for shabby chic crafty fun.

Blog Widget by LinkWithin