Monday, August 31, 2009

A Weekend of Wedded Bliss

Clustered into a crystal bowl Joe and I received as a wedding gift, a dozen white roses add a little loveliness to his parents' house, where guests gathered to celebrate their golden wedding anniversary.

We enjoyed a wonderful weekend honoring Joe's parents on the occasion of their 50th wedding anniversary. The celebration included dinner by the pool Friday night at their lakeside home with out-of-town guests; an elegant plated dinner for 60 at the country club Saturday night; and a poolside barbecue Sunday after church for lingering friends and family.

The weekend provided a sentimental look back at 50 years in the Lester family. It was a celebration of love and faithfulness, and I was so thankful to play a part in honoring this special couple.

I have so many creative ideas to share from the weekend. Between my sister-in-law Emily, a wedding and event planner in New York City, and my sister-in-law, Shannon, an artist with unmatched creative flair, no detail was overlooked throughout the weekend. Thankfully, my photographer brother, Nathan, was on hand Saturday night to capture images from our special evening. So I look forward to sharing details of our celebration all week!

"Newlyweds become oldyweds, and oldyweds are the reasons that families work." -- Author Unknown


Friday, August 28, 2009

Moments from Heaven's Past


Looking through old photographs, I found this video I made two years ago. It is bittersweet to watch it now, realizing how much the children have grown.


Thursday, August 27, 2009

Preppy Hobo Bag

Bummed about last season's handbag? Then update your look with this charming hobo bag!

Damask fabric always catches my eye, so this trendy pink hobo bag from online boutique Whitney Caroline Designs made me swoon. The pattern is feminine, but the fabric and construction ensure this will be a hard-working tote. This roomy bag is generous enough to accommodate magazines and file folders, while three inside pockets keep smaller items close at hand. The purse even includes a zippered cosmetic bag in the same cheery fabric. A green monogram adds a final preppy detail to make this a bag I will carry all season.

Whitney Caroline is an adorable southern girl who shares a love of monograms, polka dots and preppy color combinations. Visit her boutique for great gifts and fab finds. Then check out her blog for giveaways, project ideas and party-planning tips. Between these two great sites, you are sure to find something that has your monogram on it!


Wednesday, August 26, 2009

Emma's World


I often suspect that 3-year-old Emma lives in her own world -- a wonderful place full of giggles and fairy dust. And from the looks of things, Emma's world must be prospering. Because unlike the rest of us who are trying to cut costs in this struggling economy ...


In Emma's world, they are actually cutting money.
Where is this magical place, you may ask, where joy is abundant and money grows on trees? Well, Silly, I asked her myself where she lives, and she gave me this simple answer:


"Emmabama!"

Tuesday, August 25, 2009

And Smell the Roses

Even during a busy week when there is no time to stop, I can still smell the roses with a bouquet slipped into a favorite teapot. And when this week's lengthy to-do list has me longing for a quiet afternoon with a cup of tea, I can at least pause to savor the beauty of these luscious blooms. I hope that catching a glimpse of these roses will remind me that just like this teacup, my cup of blessings runs over!

Monday, August 24, 2009

A Resting Place

During church recently, 3-year-old Emma snuggled up between 10-year-old Carson and me. Emma loves to cuddle with the two of us, stretching out between our laps. This Sunday seemed like any other to me until Carson's eyes grew wide with delight. He turned to me, eyes twinkling, and whispered, "This time I get the head and you get the feet!"

I looked down with surprise, realizing that Carson was right. I had never really registered that during this sweet worship-time ritual, I got the best end of the deal. Emma would rest her head softly in my lap, looking up at me with big blue eyes, her little mouth drawn up in a sweet smile. I would rub her back gently or stroke her soft golden hair.

A little further down the pew, Carson would get Emma's feet, her white dress shoes landing in his lap with a thud. And each time she rolled over or shifted in the pew, Carson braced against the movement of her restless feet.

Because he adores his baby sister, Carson was willing to accept this arrangement. But what a thrill it was for him when finally Emma deemed his the lap of luxury. He wore a contented smile through the rest of the worship service, so happy to snuggle with Emma.

From my spot on the pew, I considered my spiritual life as I looked down at Emma's feet in my lap. And I wondered how often I stretch myself between heaven and earth. Just like Emma, who wants to snuggle with both Carson and me, I know I value both the physical and the spiritual. But I am afraid that too often I lay my head in the lap of the world, giving the best of my time and energy to earthly concerns and devoting only the scraps to my relationship with God.

But when I rest my head in the world, my thoughts become ensnared by temporal things. And how easy it is for materialism, cynicism or worry to take hold!

Matthew 6:24 reminds me, "No one can serve two masters; for either he will hate the one and love the other, or else he will be loyal to the one and despise the other. You cannot serve God and mammon." Contentment is ours when instead of trying to stretch ourselves between heaven and earth, we simply climb into our Father's lap. As Matthew 6:33 explains, when we seek Him first, other priorities just fall into their proper place.

As much as Carson and I enjoy our shared snuggle time with Emma, I'm sure we would both agree that this worship-time ritual falls a distant second to actually holding her. When little Emma climbs into your lap, wrapping her dimpled hands around your neck and nuzzling her soft cheek against your shoulder, you feel so blessed to be the chosen one.

How truly blessed we are that our Father invites us into His lap, imploring, "Come to Me, all who are weary and heavy-laden, and I will give you rest" (Matthew 11:28). Clasped in prayer, we wrap weathered hands around His neck. And as we snuggle up to read His Word, He whispers expressions of love and faithfulness, each tender scripture reminding us that He loves us from the top of our numbered-hair heads to the bottom of our washed feet (Matthew 10:30; John 13:5). At last, our restless spirits have found a resting place, nestled snugly in our Father's lap.


Friday, August 21, 2009

The Write Stuff


Excitement was high on the first day that all four children went to school, so I thought I would plan a special family dinner to get the school year off on the write foot. The children gave my pencil-themed decor good marks. Click on the collage to catch more of the details!

For the arrangements, I filled small bud vases with flowers. Then I slid a rubber band around each vase and slipped a handful of pencils under the rubber band. When the vase was covered, I tied a ribbon around the pencils to cover the rubber band.

The centerpiece of our table was a pencil cake. I baked a cake mix in a loaf pan and shaved slivers of cake off to form the tip. (These pencil shavings didn't last long!) Pink, yellow and gray icing helped the pencil take shape, and chocolate chips and a Hershey's Kiss added the final details. We enjoyed this pencil for dessert, and so far no one has developed lead poisoning!

A handful of pencils and a card printed with Proverbs 1:1-6 made nice favors. Had I thought about it earlier, I would have ordered personalized pencils for the children. (Find them here, here and here.) That would have made our dinner extra special!

So if you are looking for a fun way to celebrate the start of another school year, pencil in family fun with a tablescape that has all the write stuff.


Thursday, August 20, 2009

Butterscotch Cookies


Nestled into a blue metal lunchbox, fresh-baked butterscotch cookies said "Welcome Back" to Faulkner University students who visited our congregation last Sunday.


Butterscotch Cookies
A co-worker, Olivia, shared this easy recipe with me years ago.
1 package yellow cake mix
1/2 cup cooking oil
2 tablespoons water
2 eggs
1 cup (6 ounces) butterscotch pieces
1/2 cup chopped nuts
Preheat oven to 350 degrees. Blend cake mix, oil, water and eggs. Stir in butterscotch pieces and nuts. Drop from teaspoon onto an ungreased cookie sheet. Bake at 350 degrees for approximately 10 minutes. (Cookies do not need to be brown.) Cool on a cookie sheet for about 1 minute, then remove to paper towels to finish cooling. Yields about 35 cookies.

Wednesday, August 19, 2009

Kindergarten Dreamer: Make a Nap Mat

I told Joe that the only way I can handle transitions as my children grow is to craft my way through them! Making a nap mat to send with Mary Ashley to kindergarten was a useful project, and I relished the idea of tucking her in at nap time each day with a soft hug from Mommy.


The day before school started, Mary Ashley and I did some shopping for cozy sleepy-time fabrics.

I estimated that we would need 1/2 yard of fabric for the pillow, 1 yard for the blanket, and 1 1/2 yards for the mat. Mary Ashley loved the plush pink fabric we discovered at Hobby Lobby, and I thought it would work well for the pillow. I wanted to use fleece for the blanket, and Mary Ashley snuggled right up to the bolt when she found her perfect choice at Hancock Fabrics: pink with pastel butterflies. (I realized afterward that attaching a pre-made blanket would have been the quicker option.) A soft yellow flannel with pastel polka dots, also found and Hancock's, was a perfect coordinate for the other fabrics. A spool of pink grosgrain ribbon would tie everything together, and a crib-size package of batting and a square of 1" thick washable polyurethane foam would add softness without too much bulk.


I didn't have a pattern, but I could picture what I wanted: a narrow mat with attached blanket and pillow that could be rolled up and carried like a satchel. I started by spreading the flannel on the floor. Then I folded the batting into thirds lengthwise and placed it on top of flannel. I folded the flannel in half over the batting. With the batting tucked inside, I cut the flannel down, allowing for seam allowances for the top, bottom and right side of the mat.

Before stitching the mat together, though, I needed to attach the fleece blanket. Originally I had planned to attach the blanket to the bottom of the mat so she could pull it up over her, but Mary Ashley preferred the blanket attached to the side so she could pull it across her. So I cut the fleece down to suit the length of the mat and pinned it to one long side of the flannel. (I left the full width at this point, so I could adjust that dimension later.) I wanted the blanket to lay across the mat right-side-out, so I pinned the wrong side of the fleece to the right side of the flannel. Then I used a straight stitch to sew the fleece to the flannel.

Next, I rolled up the fleece so I would avoid catching it in the seams as I sewed the mat. I folded the flannel in half, right sides together, and pinned the bottom and right side. Then I sewed these two pinned sides of the mat, careful to stitch inside the seam securing the blanket to the mat. I turned the mat right side out and pressed it smooth. Then I tucked the batting inside. The project was starting to take shape!

It was time to make the pillow, so I cut a rectangle of foam and cut a strip of our fuzzy pink fabric to wrap around it. Then I folded this in half, right sides together, and sewed the two short sides together. I turned the resulting pillowcase right side out and slipped the foam inside.

To attach the pillow to the mat, I first folded the raw edges of the open edge of the mat to the inside. Then I slipped the open edge of the pillow into the mat opening and pinned it in place. A straight stitch across the top of the mat finished the mat and attached the pillow as well. The pillow could rest on the mat or be flipped up to give extra length.

To finish the fleece blanket, I spread it across the mat and had Mary Ashley lie down so I could estimate how much width I needed to leave. I then cut away excess fabric and finished the edges by cutting a fringe and tying the strips together.

With the mat itself completed, I folded the blanket to the inside and rolled up the mat. I then pinned ribbon to the outside of the mat to get the right length for handles. With this adjusted, I sewed the length of ribbon end to end to make a ring. Then I pinned the ring to the mat and sewed it into place, leaving the handles loose. Sewing the ribbon through both layers of flannel and the batting keeps the ribbon in place, but it also serves to keep the batting from shifting.

I finished this project so late the night before school started, I did not have time to add a monogram. But that would be cute to add as a finishing touch to the blanket or to the outside of the mat.

Mary Ashley was so pleased to awake to a new nap mat! Above, left, Mary Ashley shows how easy it is to carry. And above, right, from the side you can see how it folds open.

If you want to make a nap mat for a little dreamer in your life -- whether for school, daycare or a trip to Grandma's -- I will try to answer any questions about this project in the comments section.

Tuesday, August 18, 2009

Apple Tea Recipes


Apple tea was a refreshing treat at the back-to-school tea party I did for my children recently. I sampled it hot, and it was delicious! But for our outdoor party we enjoyed it over ice.


Apple Tea
Brew 3 family-size tea bags for 3 to 5 minutes. Allow the tea to cool slightly, then stir in 1 1/2 cups sugar. Add 2 to 3 cups apple juice, depending on how strong you want the apple flavor to be. Pour the cooled mixture into a pitcher and fill to the top with water. Serve over ice. Makes 1 gallon.


Fresh maple scones were a treat served with apple jelly and almond cream. I froze the leftover scones to reheat and serve later with blackberry jam.


Maple Scones
4 cups flour
4 tablespoons sugar
2 tablespoons cinnamon
4 teaspoons baking powder
1/2 teaspoon cream of tartar
1/2 teaspoon salt
3/4 cup unsalted butter
1 large egg
1 1/2 cups half and half
Preheat oven to 425 degrees, and coat a baking sheet with cooking spray. Combine dry ingredients in a large bowl, and cut in butter with a pastry blender until the mixture resembles coarse crumbs. Separate an egg, placing the yolk and white in separate bowls. Beat egg yolk with a fork, then stir in cream. Add this mixture to the crumbly dough, and stir lightly with a fork until the dough sticks together. Turn dough onto a lightly floured surface, and knead 5 or 6 times. Using a floured rolling pin, roll out the dough to about a 1/2-inch thickness. Use cookie cutters to cut the dough, and place the scones on the prepared baking sheet. Beat the reserved egg white, and stir in 1/3 cup cream and 2 tablespoons Mapeline flavoring. Brush this mixture over the scones, and sprinkle the tops with additional sugar. Bake for 15 to 18 minutes, or until golden brown. Serve warm. Note: Freeze leftover baked scones. To reheat, bake frozen scones in a 350-degree oven until warm.


I love apples in my chicken salad, but I thought serving chicken salad on apples would be a refreshing twist for this afternoon tea favorite.


Chicken Salad on Apples
1/2 rotisserie chicken, shredded
1 tablespoon mayonnaise
1/2 teaspoon Grey Poupon Mild and Creamy
1/2 teaspoon apple cider vinegar
1/2 teaspoon salt
1/4 teaspoon pepper
1/4 teaspoon basil
1/3 cup celery, finely diced
1/6 cup walnuts
3 to 4 medium apples
Lemon juice
Place shredded chicken in a mixing bowl. Combine mayonnaise through basil in a separate bowl, stirring to make a dressing. Spoon this over chicken, and stir to combine thoroughly. Gently fold in celery and walnuts. Store in the refrigerator. Shortly before serving, cut apples into thin slices and dip the slices in lemon juice. Use a melon baller to scoop chicken salad onto the apple slices. Serves 6.


Little apple cupcakes provided a sweet end to our back-to-school tea. To make these, I piped red icing onto mini cupcakes with a star tip, peaking the icing in the middle to create a domed effect. A tiny piece of chocolate tucked into the icing looked like a stem, and a little green leaf piped onto the stem finished off the apple.


I hope you will show loved ones they are the apple of your eye by sitting down together with one of these easy recipes!

Monday, August 17, 2009

Back-to-School Tea Party


A few days before school started, I planned a tea party for my children to celebrate the year ahead. Since I love my little ones a bushel and a peck, apples provided a great theme for our back-to-school afternoon tea.


Our tea party menu included a refreshing iced apple tea, warm maple scones served with apple jelly and almond cream, chicken salad on apple slices, and tiny apple cupcakes. A quilt tossed over the table was a fuss-free alternative to a tablecloth, and apples and school supplies scattered about set the mood for back-to-school fun.


A back-to-school tea party provides a wonderful opportunity to begin the school year purposefully with prayer and devotional time. An appropriate passage to share is Proverbs 3:1-6: "My son, do not forget my teaching, but let your heart keep my commandments; For length of days and years of life, and peace they will add to you. Do not let kindness and truth leave you; bind them around your neck, write them on the tablet of your heart. So you will find favor and good repute in the sight of God and man. Trust in the LORD with all your heart, and do not lean on your own understanding. In all your ways acknowledge Him, and He will make your paths straight."


I loved sharing a glass of tea with the children as we anticipated the school days ahead. Here are a few pictures of my Apple Dumpling Gang:


I hope Carson, Christian, Mary Ashley and Emma know they are the apple of my eye!


Tomorrow I'll share recipes from our afternoon tea!

Friday, August 14, 2009

Tabletop in a Box

Loving china and tableware seems to run in my family, so I decided to put together a "tabletop in a box" for my sister's birthday. I hope this black-and-white set will give her a fun alternative for entertaining. Trying to put this together for under $40 was a fun challenge.


This square damask-print plate inspired the whole gift. Find them half-price at Hobby Lobby.


Clear glasses from Dollar Tree got dressed up for the dinner party with vinyl monograms.


And black-and-white dish towels -- picked up at Dollar Tree and embellished with a monogram -- are a clever alternative to traditional cloth napkins.


This cloth-covered box, also found half-price at Hobby Lobby, holds service for four with plates, drinking glasses and napkins tucked neatly inside.


When Jennifer sees entertaining in black and white, she can open this box of goodies to set a chic table for four. And then when she is feeling blue, seeing red or going green, she can pack this set back in the box to save for future use.

Pack a tabletop in a box for a great birthday, wedding or housewarming gift!

Thursday, August 13, 2009

Cool Cousins

Carson enjoys a cooling mist, while cousin David runs through a sprinkler in the background.


Carson, David and Christian play it cool.


No wonder I am asked so often if Mary Ashley and Emma are twins.


Caitlin is a happy girl.


Meme poses with Mary Ashley and Kadence.


Photos by Bob Prichard

Cousins at Play

I love the composition of this photo my brother took of his daughter, Kadence.


David experiences a classic childhood summer moment.


Caitlin is always on the move these days.


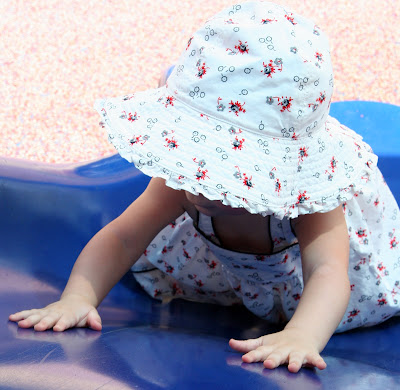
Look at that doll face!


Christian finds a perfect resting spot.


Photos by Nathan Prichard

Blog Widget by LinkWithin